
The Chicago Event Planner Magazine is excited to have Restoration Guru Jack Pettyjohn share his skills on how to recreate a 50s style Shell Chair. You never know what a client will ask you about and thanks to Jack, you can be even more knowledgeable about everything, including restoration, than you were before!
The Shell Chair Restoration
The Project
I have always had a passion for restoring the past. Cleaning off the grime, finding new purposes and creating awareness that just because something is old doesn’t mean that it has lost its usefulness. Some projects are as simple as a deep clean while others take a little more planning and time. There are always multiple ways to do a restoration project and never necessarily a right or best way. But if you’re passionate about what you’re working on and having fun it is sure to turn out well.
The Inspiration
This month’s project was inspired by my family’s cabin. We have several outdoor “Shell Chairs”, ranging anywhere from the 1930’s to the 1950’s. It is always fun to look back at pictures and see them in the background, changing colors over the years but always present. I wanted to give these chairs new life and restore them to their original glory, but before I tackled the cabin chairs, I needed one to practice on first. Thus began “The Shell Chair Restoration”.
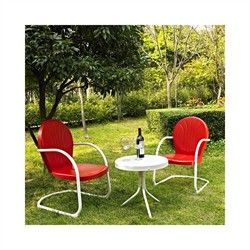
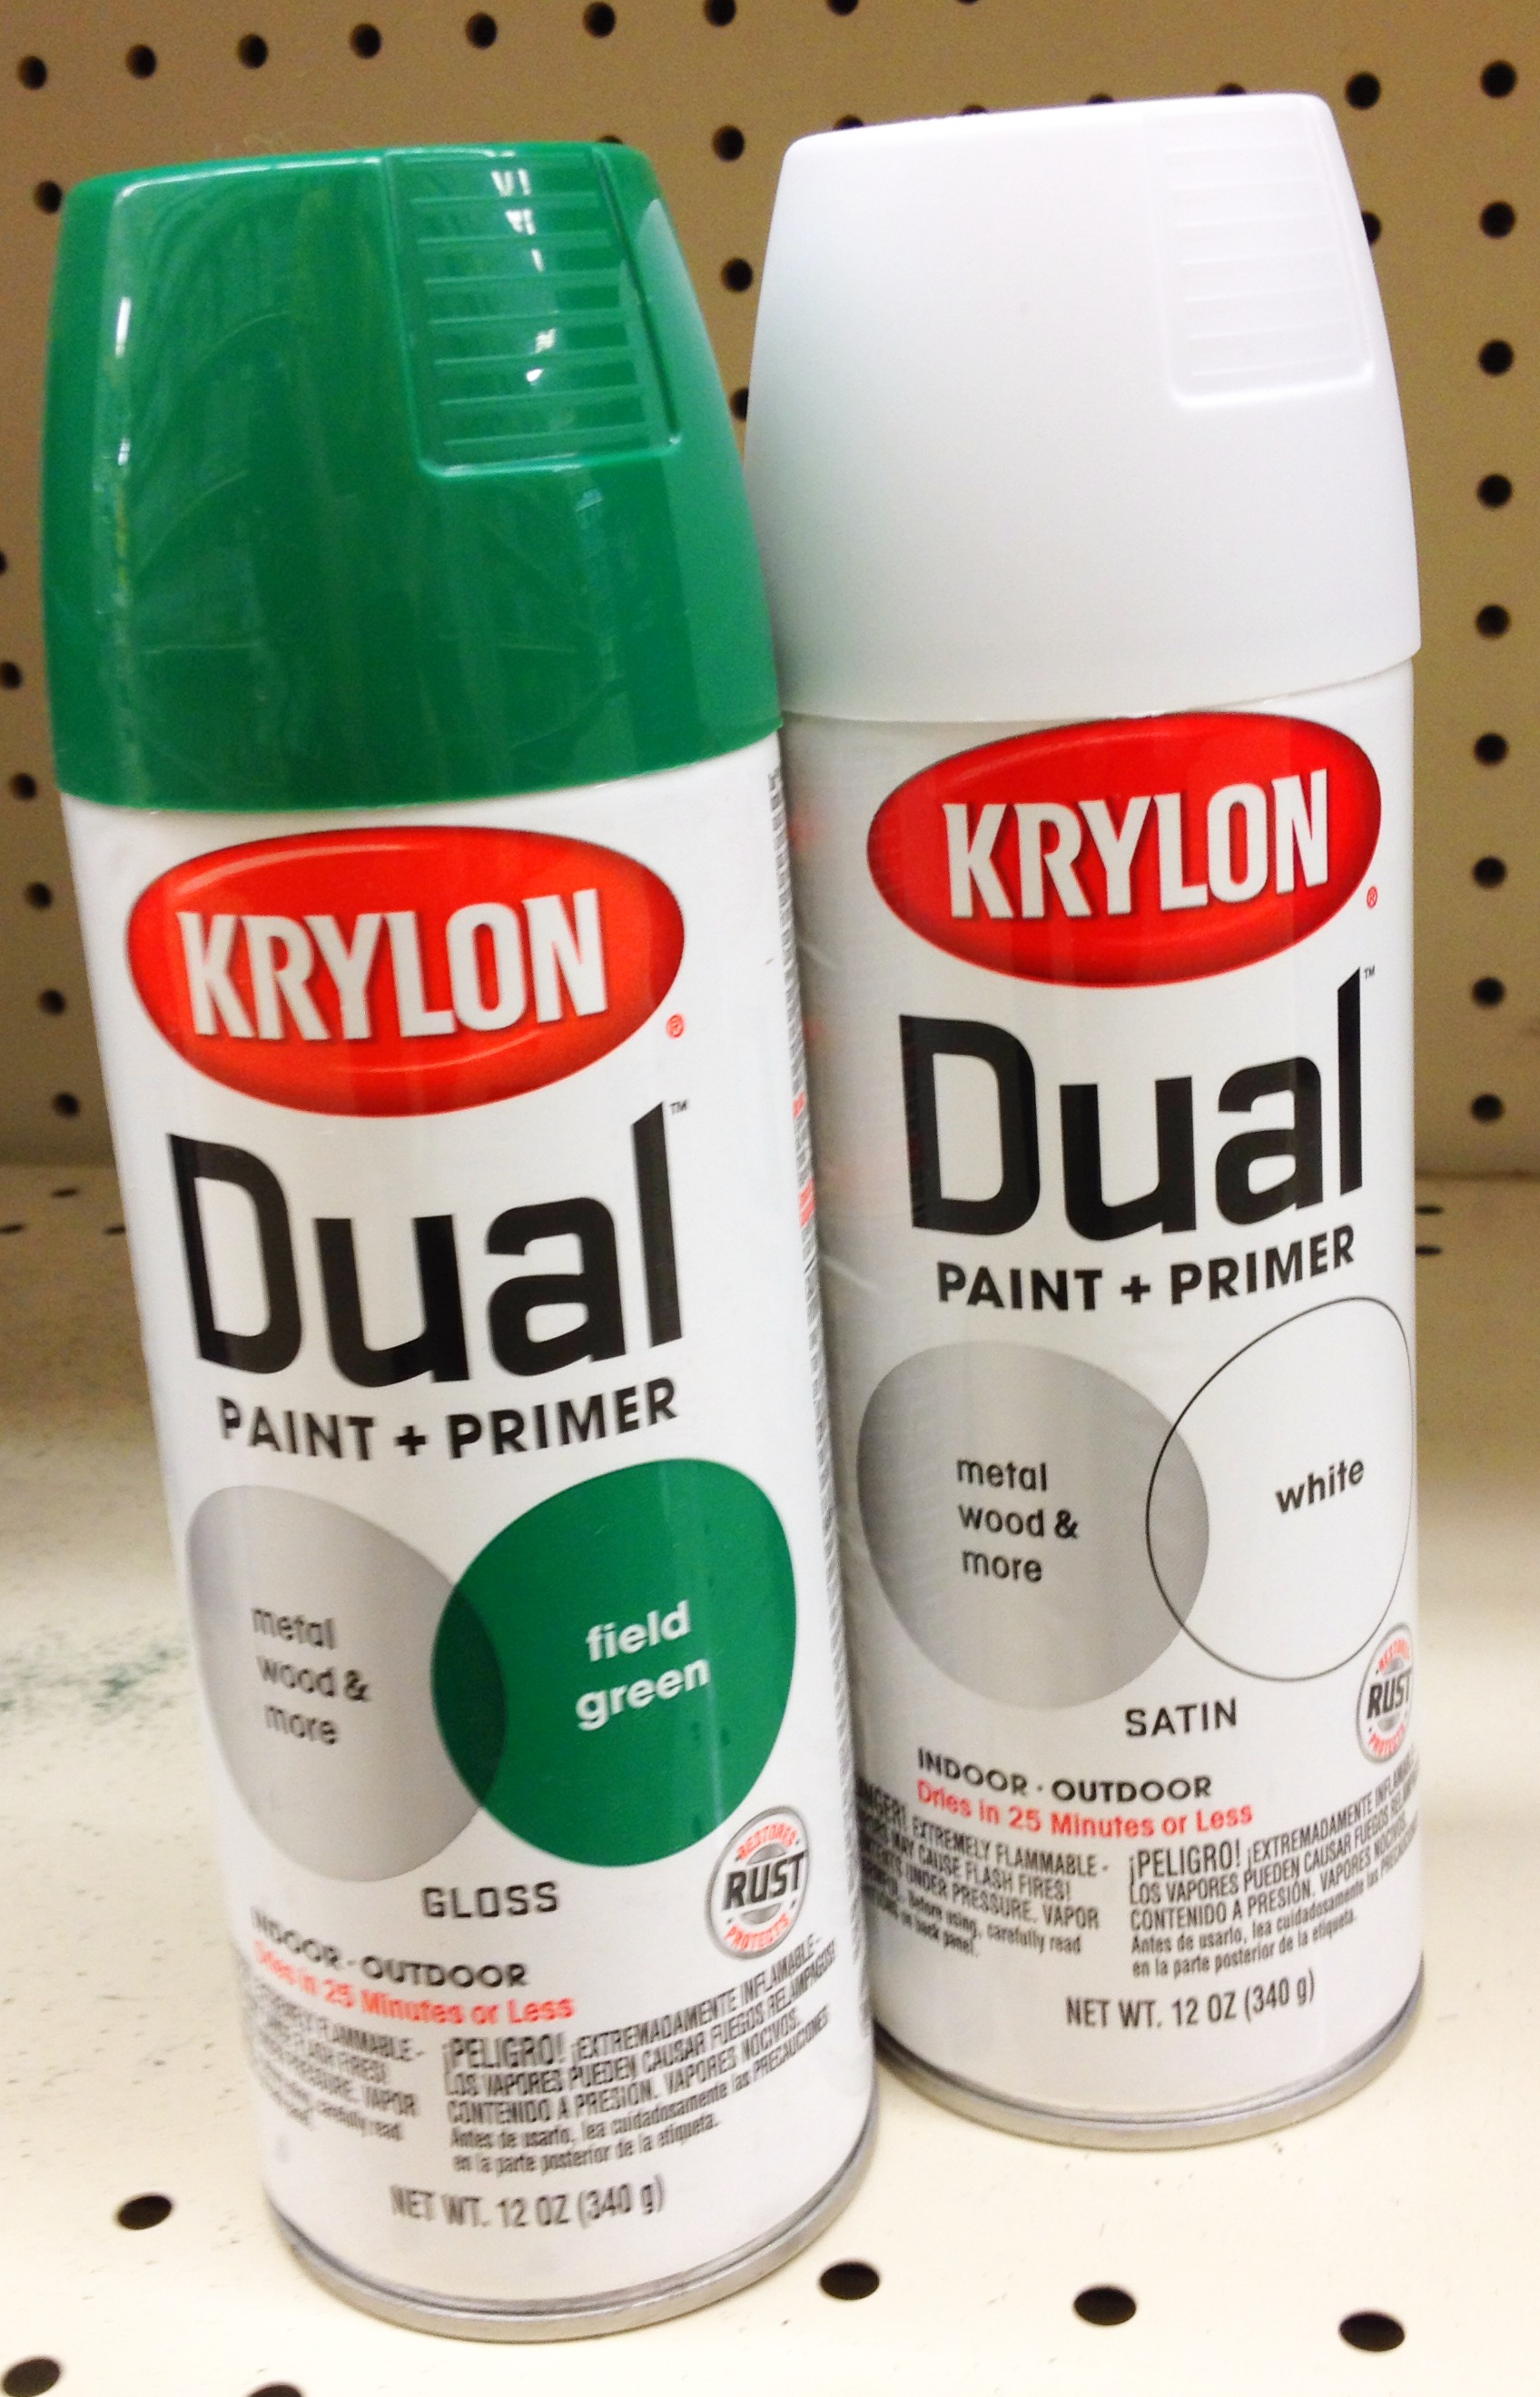
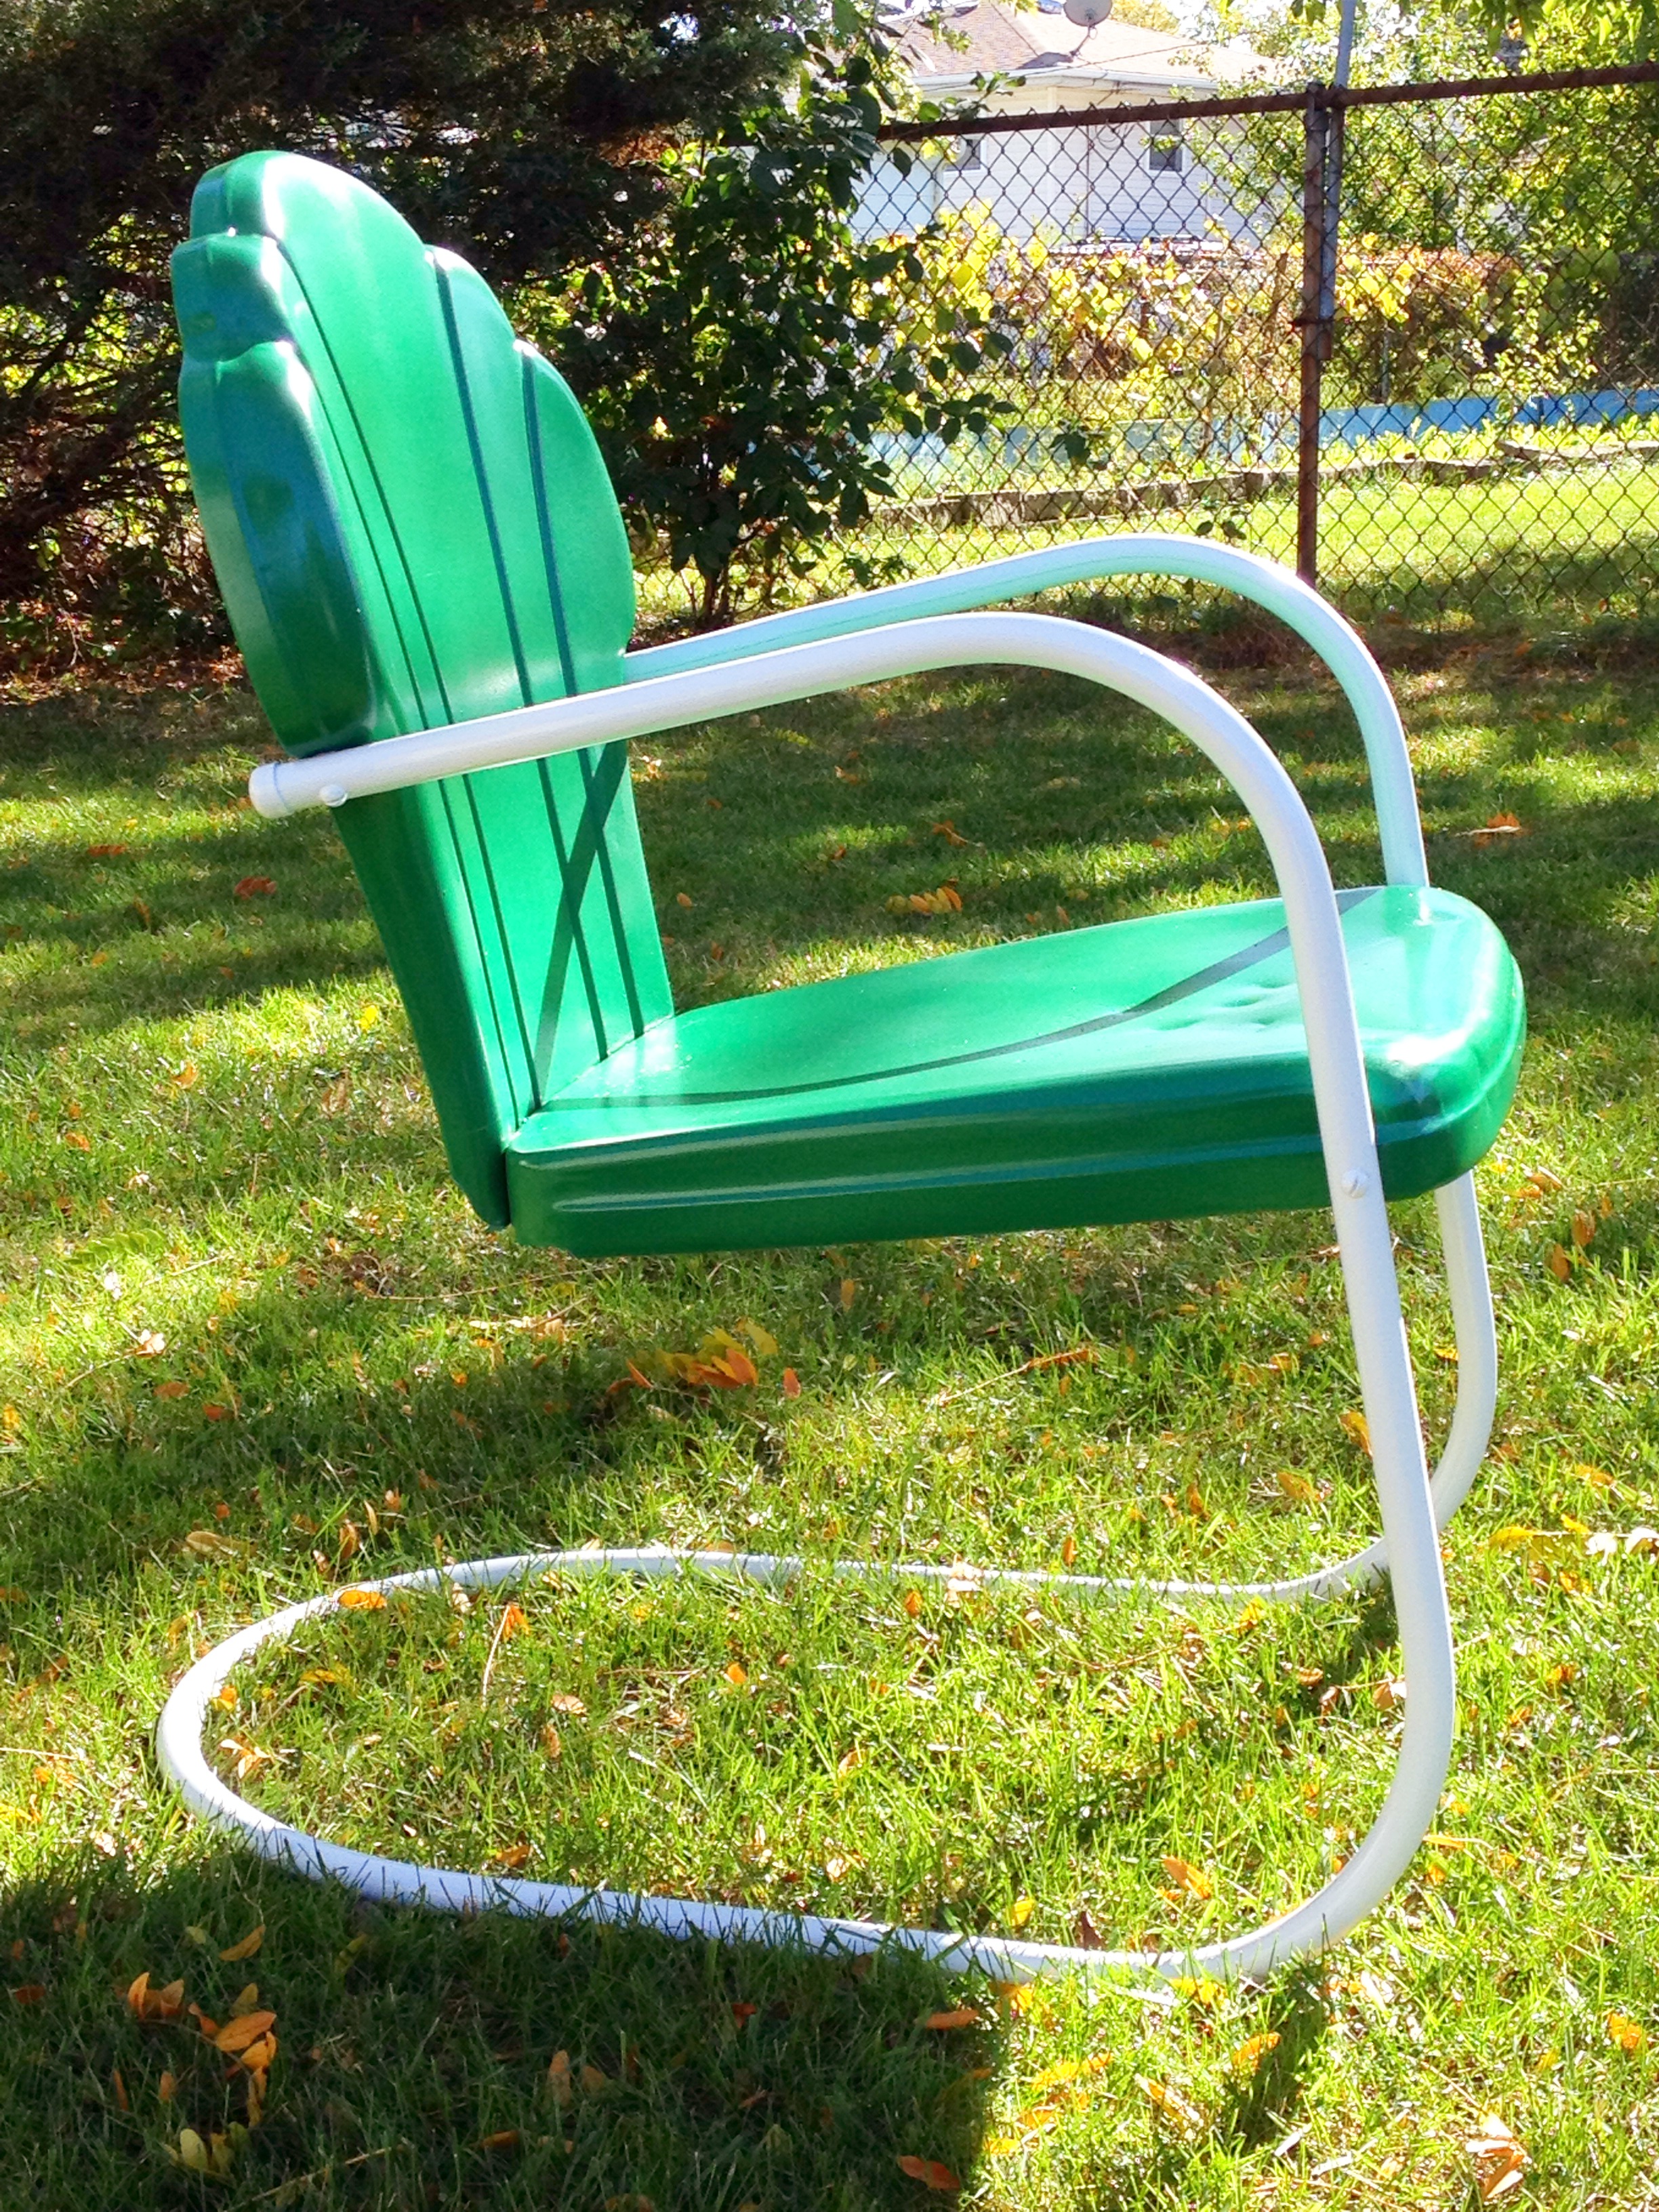
I wanted to stay true to the original color palette of the 1930’s to 1950’s style. In doing my research I found that these chairs were typically painted in five bold and basic colors: Red, Yellow, Green, Blue and White. Sometimes they were painted all one color and sometimes it was a combination of a colored seat and back with a white accent as the legs and arms. Often times, if you see reproductions of these chairs they are in new and funky colors such as orange, pink and light blue but these are not traditional and in trying to restore something to its original state you would want to keep with the colors of the day. I chose to go with the combination of white legs and arms and a colored seat and back. Specifically, I wanted to make it Kelly / Field Green to stick with our families Irish heritage.
The Find
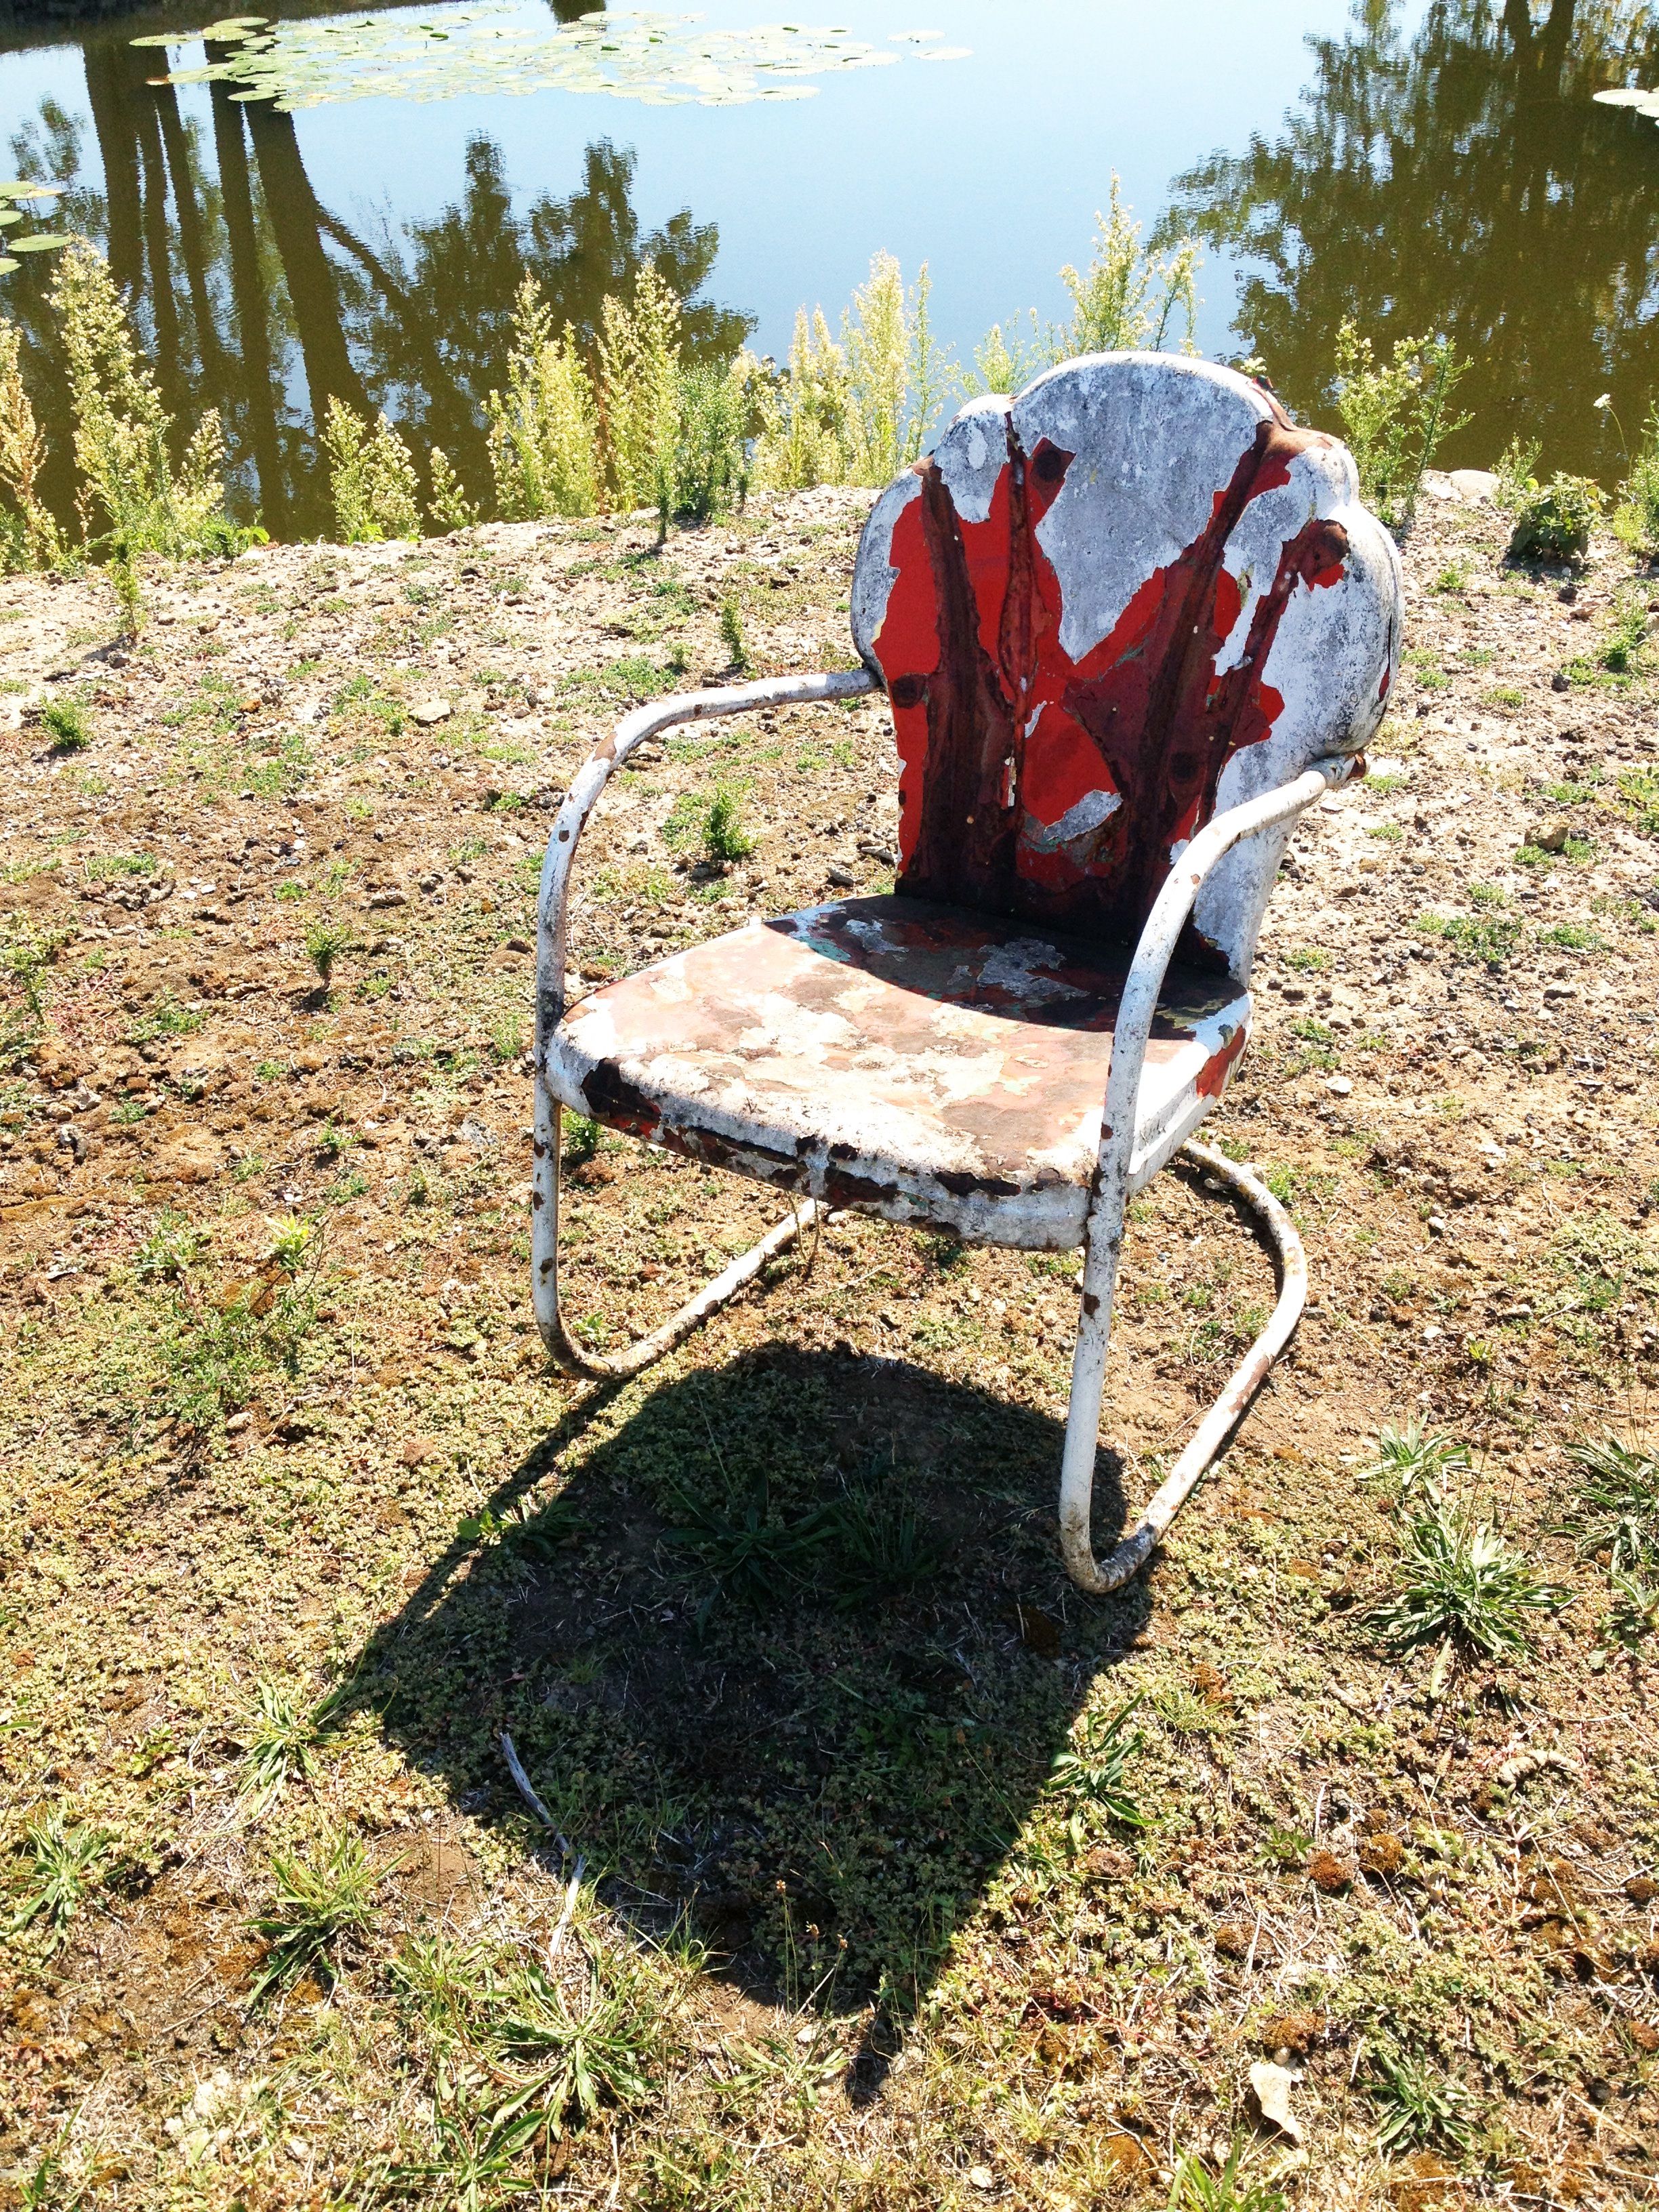
I put all family and friends on high alert. I told them I was looking for this style of chair (preferable free) and in rough condition. I wanted rustic, beat up and in need of TLC. My Uncle found one at the local garbage dump. When I finally saw the chair it was everything I had hoped for, covered in rust and over 7 layers of chipped paint and ready to be restored!
The Process
1.) Stripping the Paint
Even though there are several ways to strip paint I narrowed it down to two because of the materials and machinery I had available. Wire brush and sanding OR sand blasting.
- Wire brush / sanding: this would have done a fine job if I was just going to repaint and did not mind if there were some imperfections so I decided to go a different route.
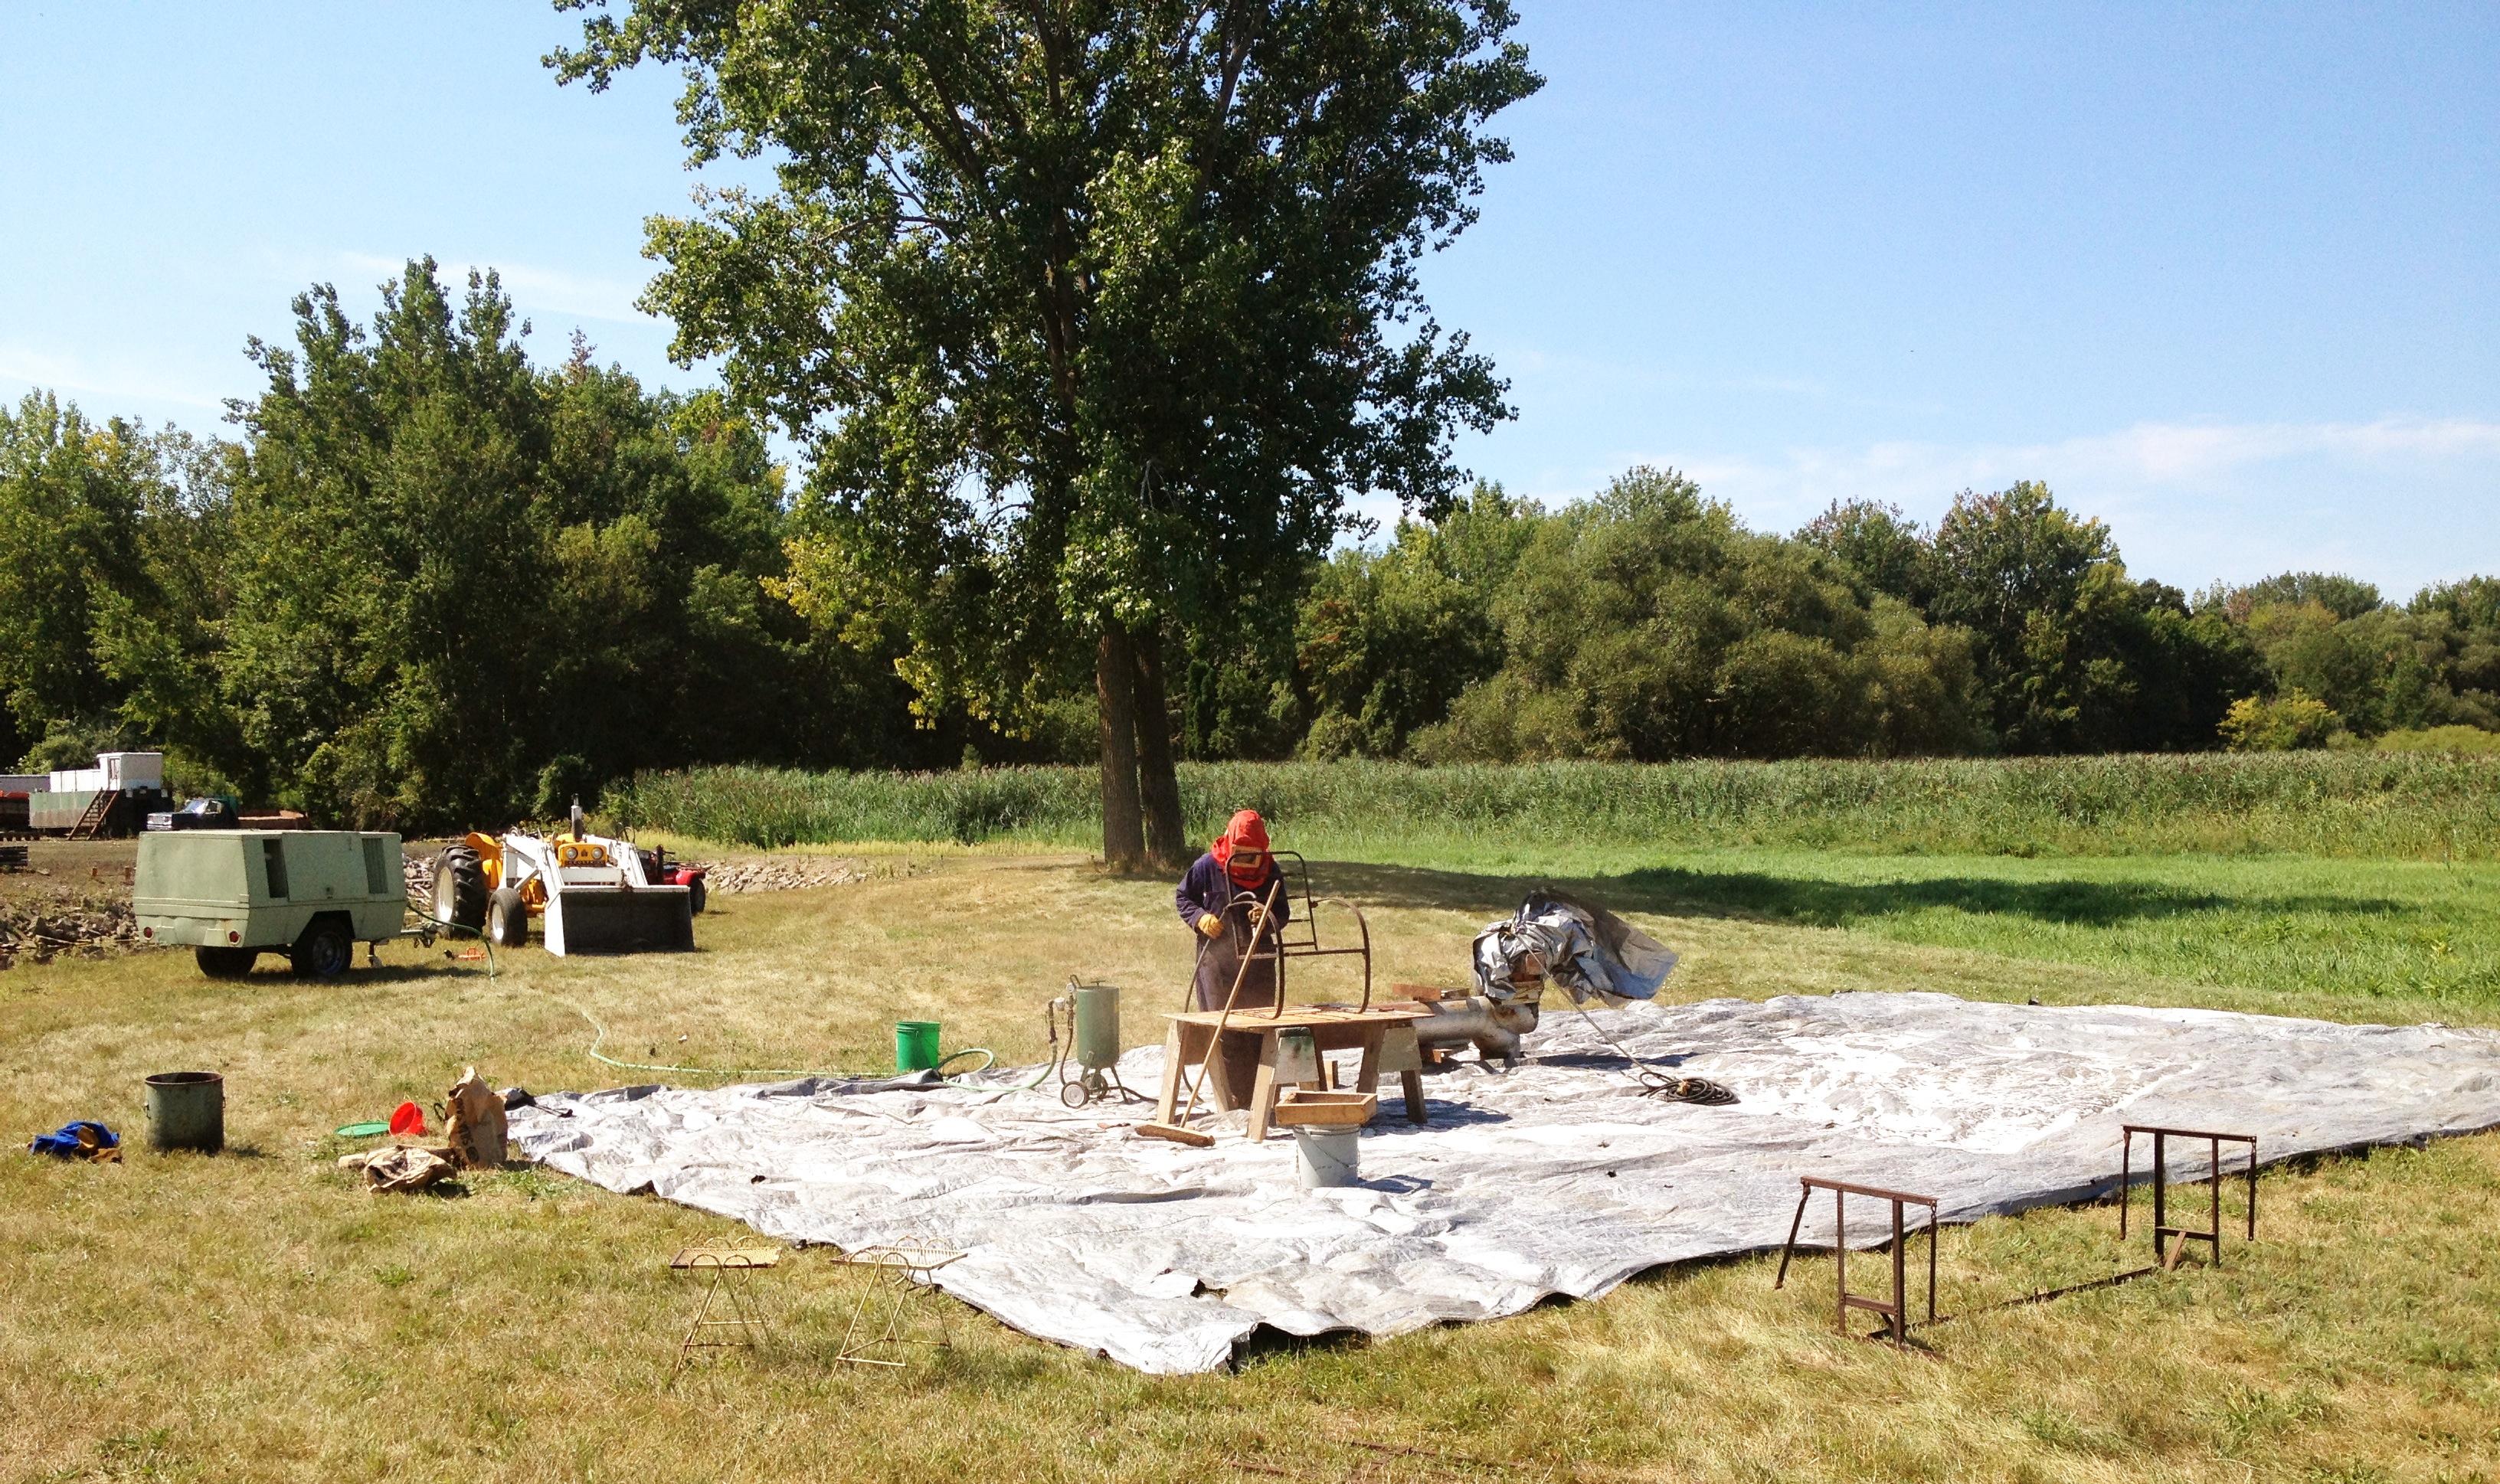
- For this project Sand Blasting was the best way to go because I really wanted to blast though all of the layers of paint instead of just scraping off the top layers: This is actually a lot of fun. For those of you who do not know what sand blasting is let it is very similar to power washing only with, get ready for it, sand! Best done outside, a very fine grit sand is poured into a pressurized container and attached to an air compressor. You then blast away the paint! For more details on different methods of Sand blasting or Abrasive Blasting (far to many details to list here) please see this educational website. http://en.wikipedia.org/wiki/Abrasive_blasting
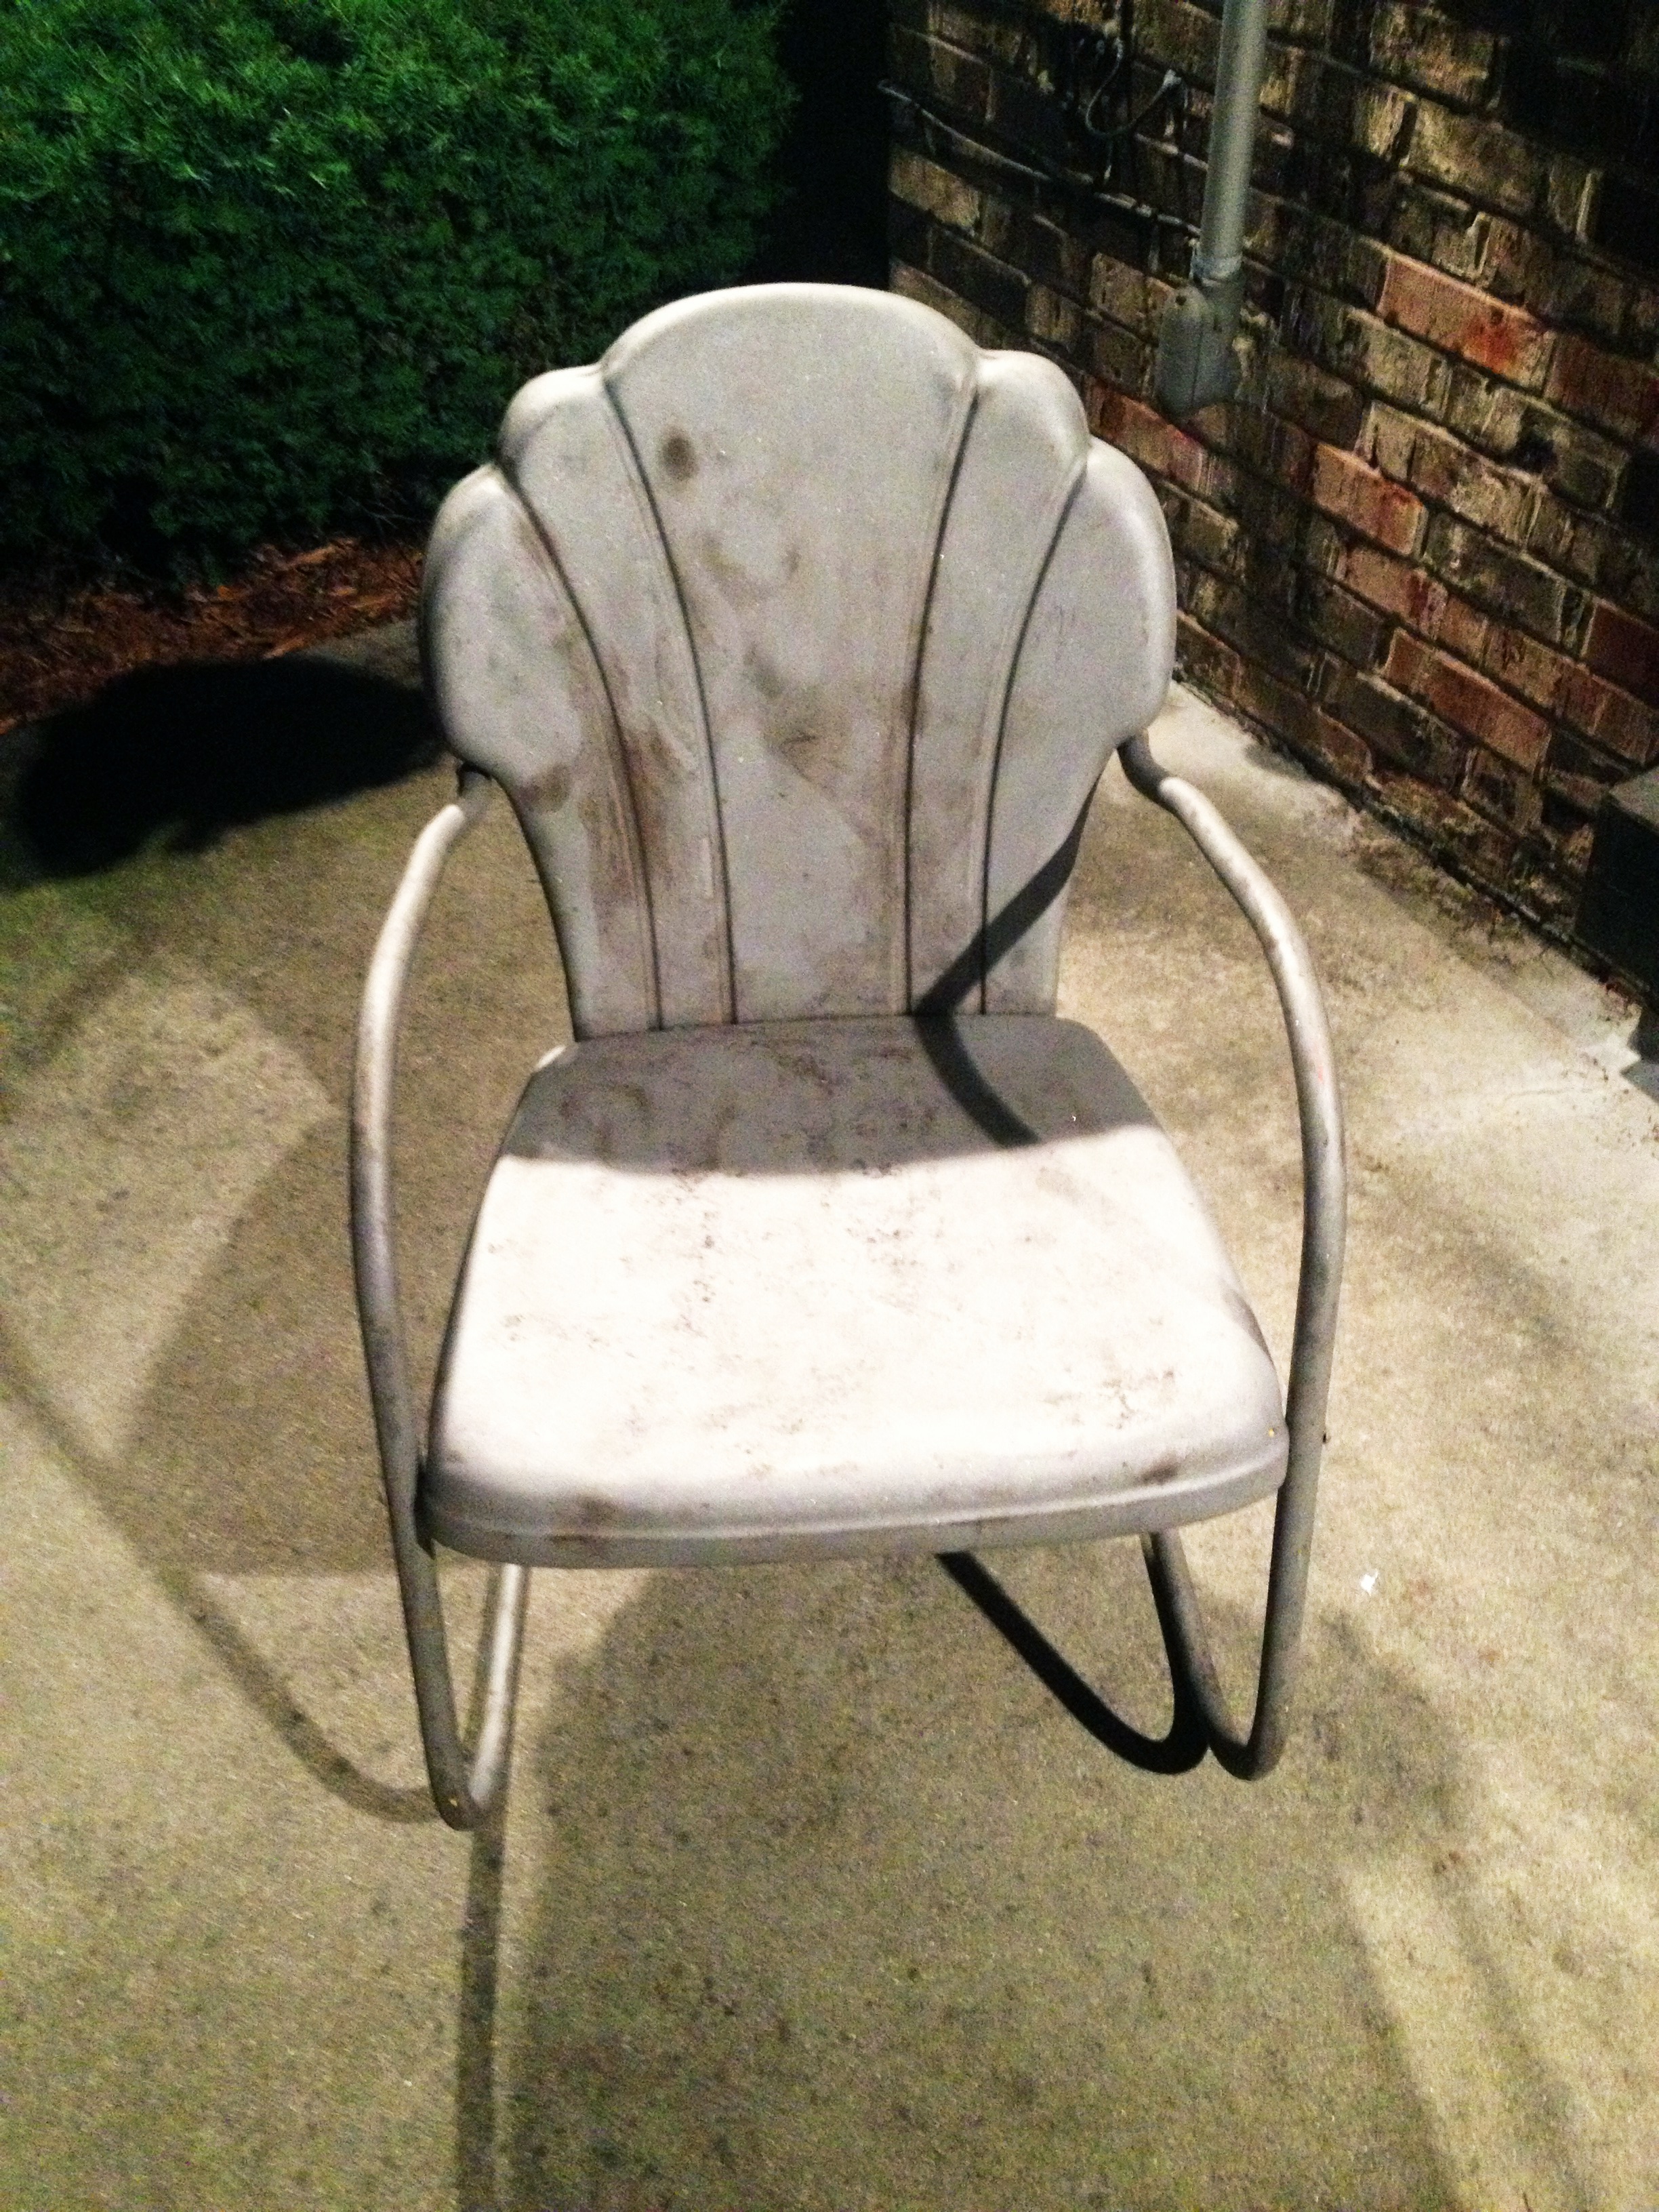
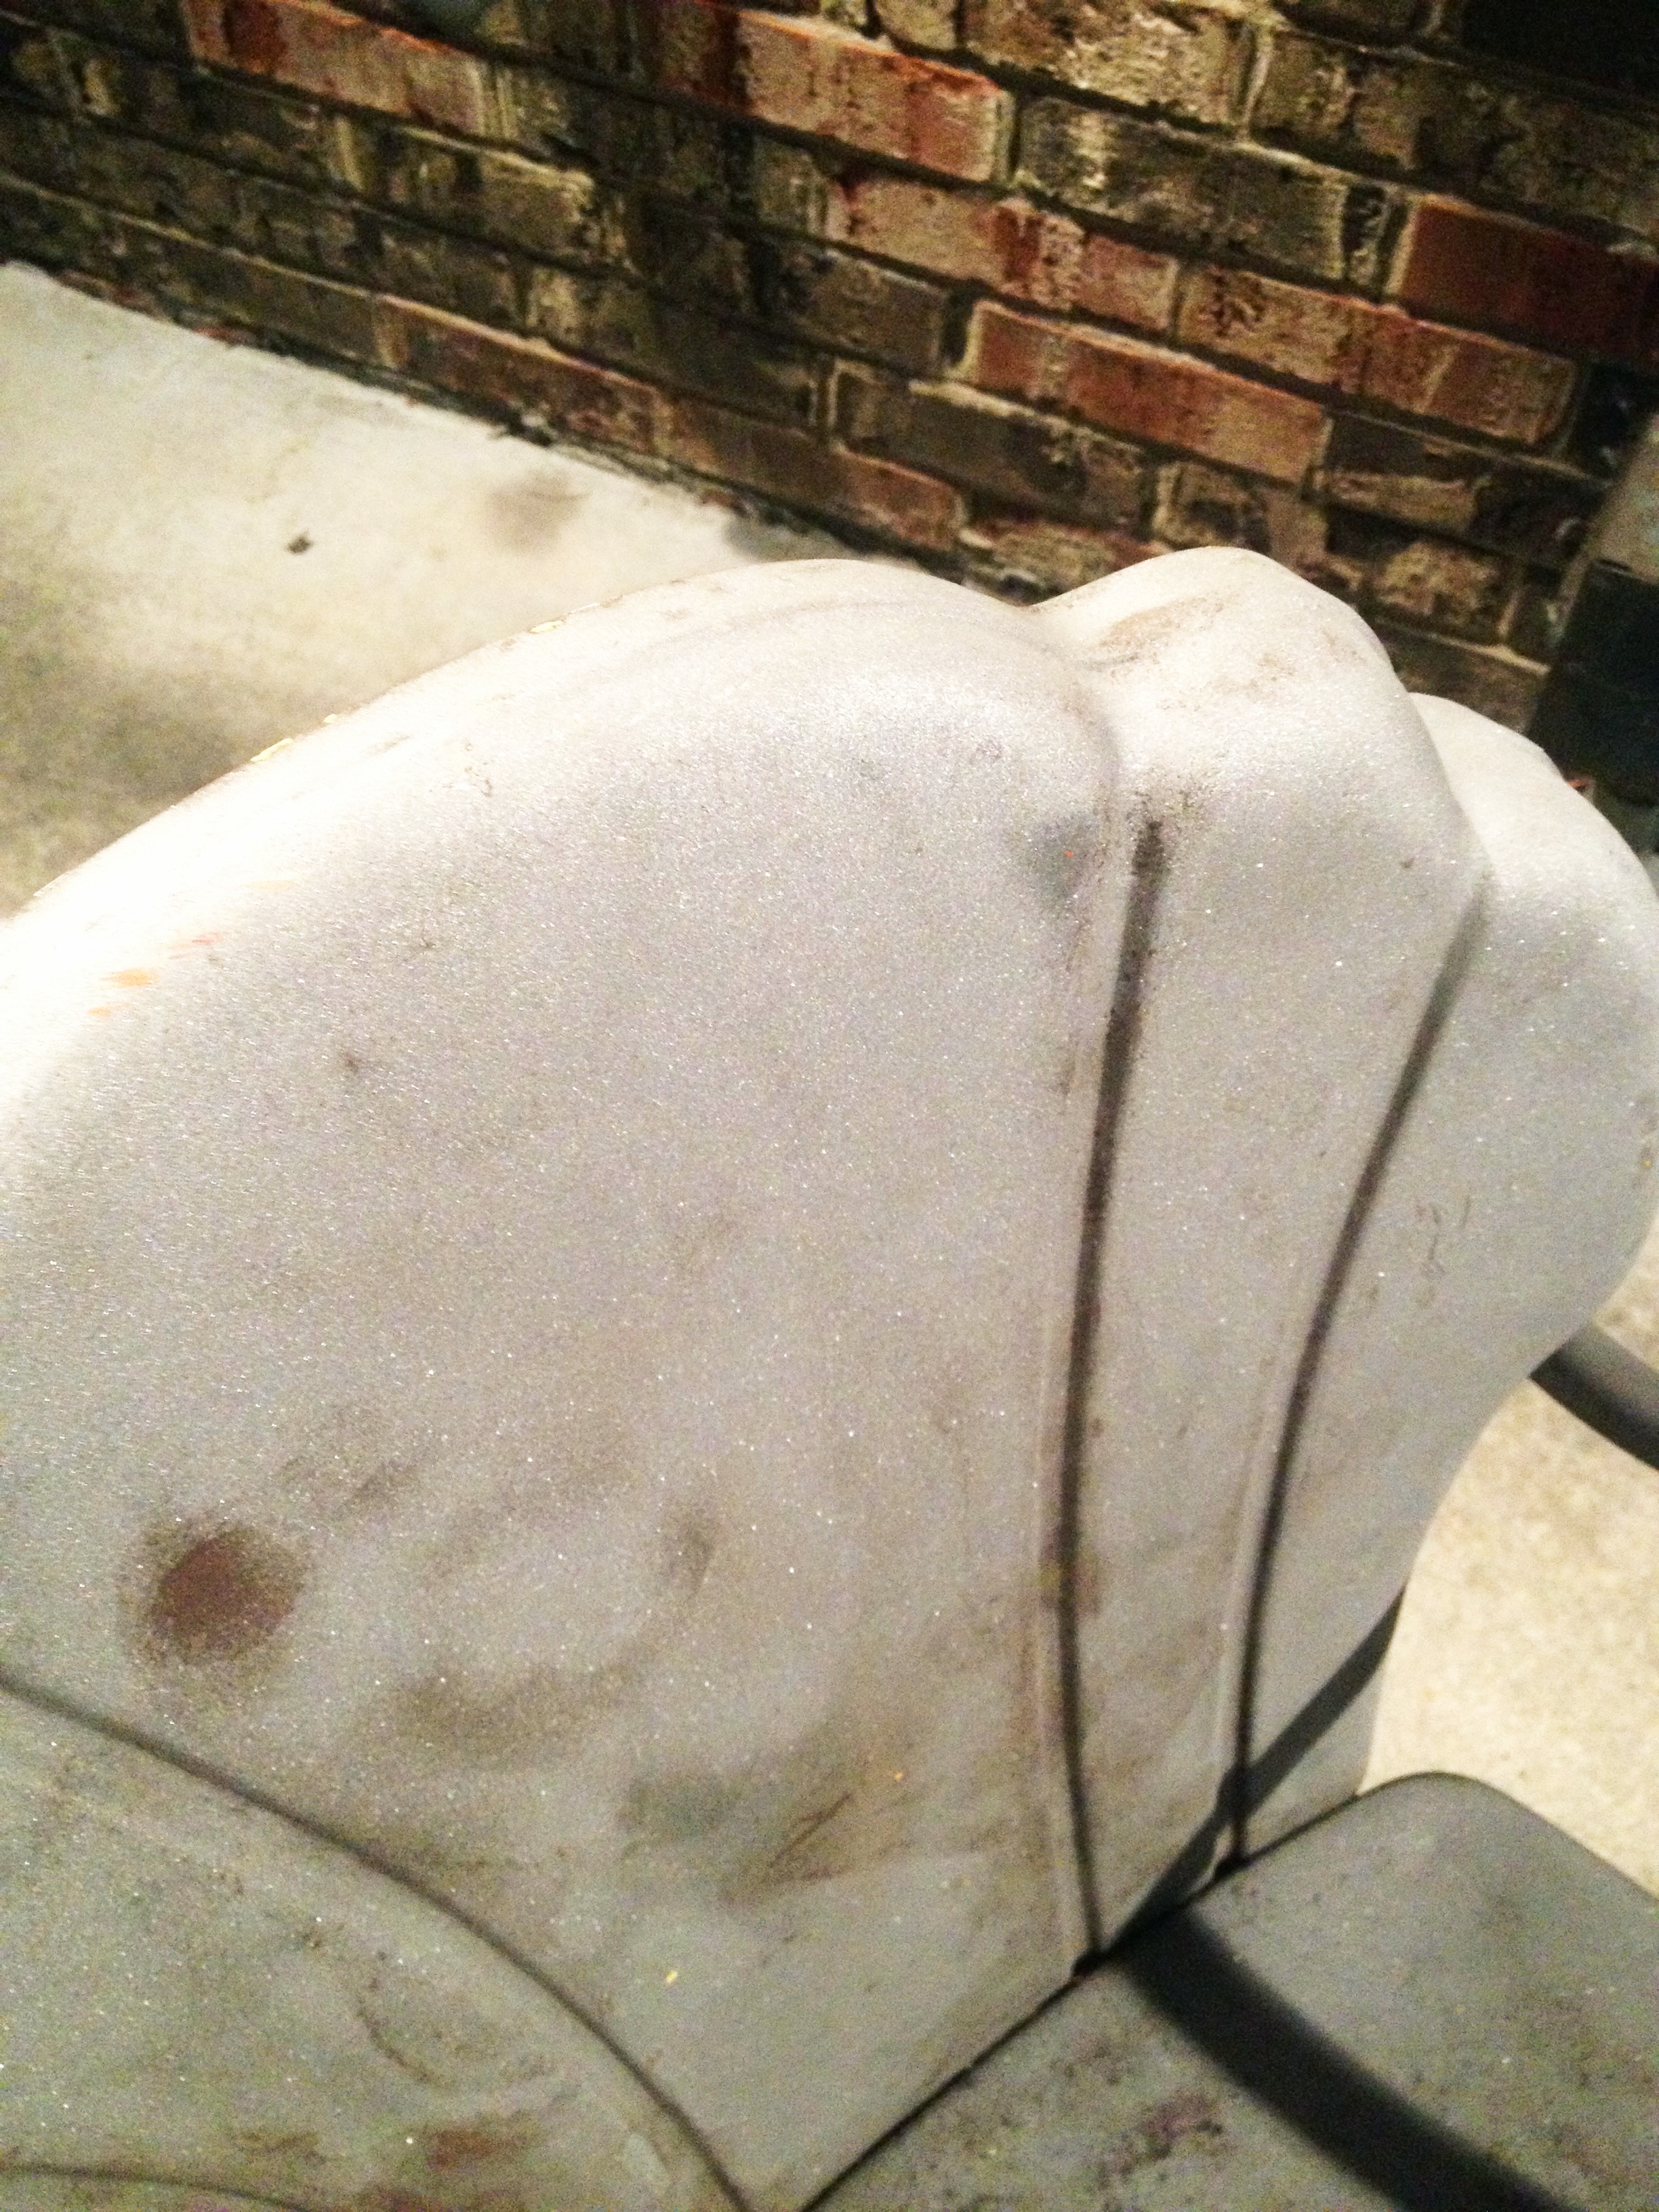
The wonderful thing about sand blasting is that it quickly strips through all layers of paint and rust getting you back down to the original metal. This provides a clean slate to start from which creates a smooth surface and also helps get back to the original shape that can sometimes be compromised when several layers of paint have been added.
2.) Painting the Chair
- Choose your colors – In my case White and Field / Kelly Green

- Visit your local hardware or paint store to look at spray paint. Spray paint works best in this type of situation because it adheres to all contours of the item you are painting and will give you the smooth look you are going for by not having brush strokes on the surface. What you want for a project like this is a Gloss Paint and Primer in one that is good for metal and protects against rust. You can buy a primer separately but if there is the option to do a two-in-one I would go for that. Gloss is also the best option for this project because the original chairs were extremely smooth and shiny. Think of a car surface, and to get that shine gloss is best. You could use a matte finish if you wanted but it would not reflect the original style of the chair. I chose the Krylon brand because I liked the color choices and it was reasonably priced. I ended up needing 3 cans of Green for the seat and back and 2 cans of White for the legs and arms.
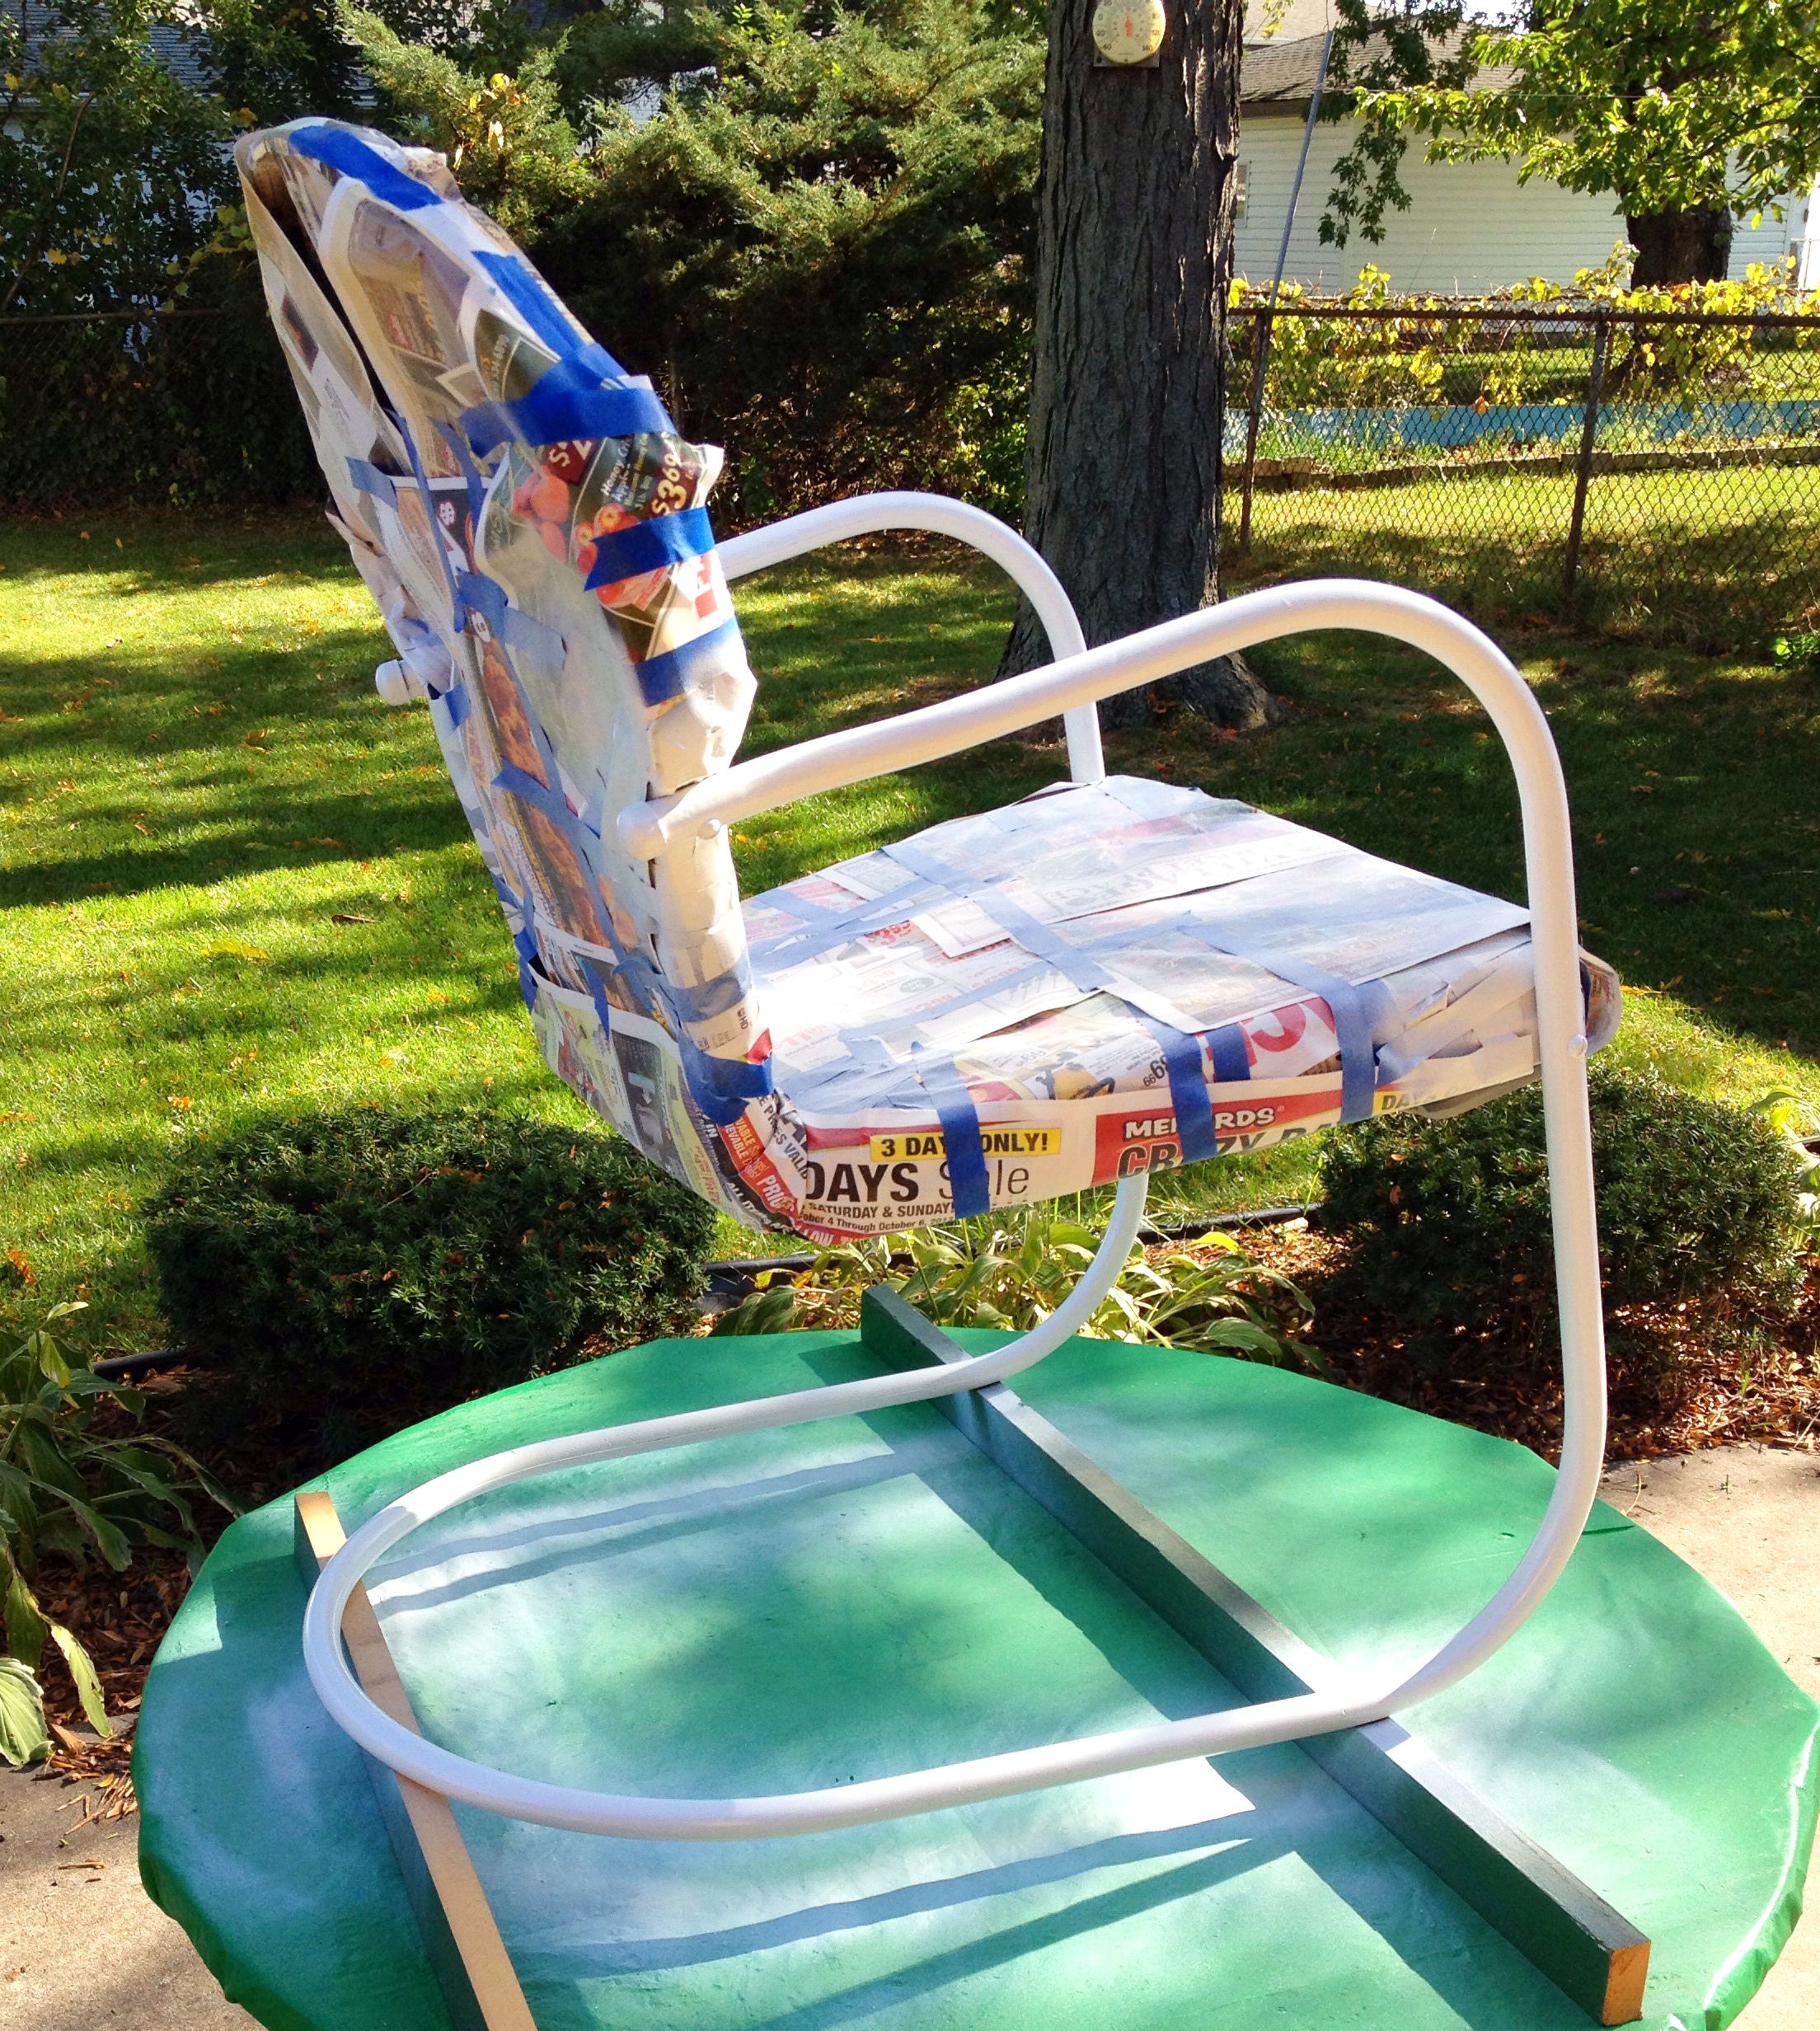
- First, start with the seat and back. It is a larger surface and since it is the bolder color the chance of over spray is less likely when you switch over to painting the second color. To get the high gloss look that these chairs originally were you have to do several very light coats of paint. In this case I did 8 coats of both the green and white paint to attain that high gloss look I was going for and the lighter each coat was the less likely you are to have drips in your spray paint. If you try to do just one thick coat the paint will typically run and you will get lines or drips.
- I typically left about 30 – 60 minutes of sunny dry time in between each coat so that it was fully cured before I continued to add additional paint and if I had to take a longer break I would leave it to cure in a warm, dry location such as a heated garage or finished basement.
- Between working on the green and white sections of the chair I let it sit for a full week so that the paint had a lot of time to set before I taped it off. Even painters tape can sometimes stick to the surface if your paint is not fully cured .You can tell if it is fully cured by just feeling the surface. If there is any tacky or sticky feeling you need to continue to let it sit.
- Next step was taping off the green section of the chair so it was fully covered (spray paint tends to find a way through nooks and crannies) so that I did not have any white over spray on my finished green. I then continued the same process on the white legs and arms.

3.) Sealing the Chair
After I had finished all the coats of both Green and wanted to make sure there wouldn’t be any scratches when people sat down in is so I decided to do several coats of a high gloss sealer which not only protected to paint but also added that last bit of shine I was really looking for.
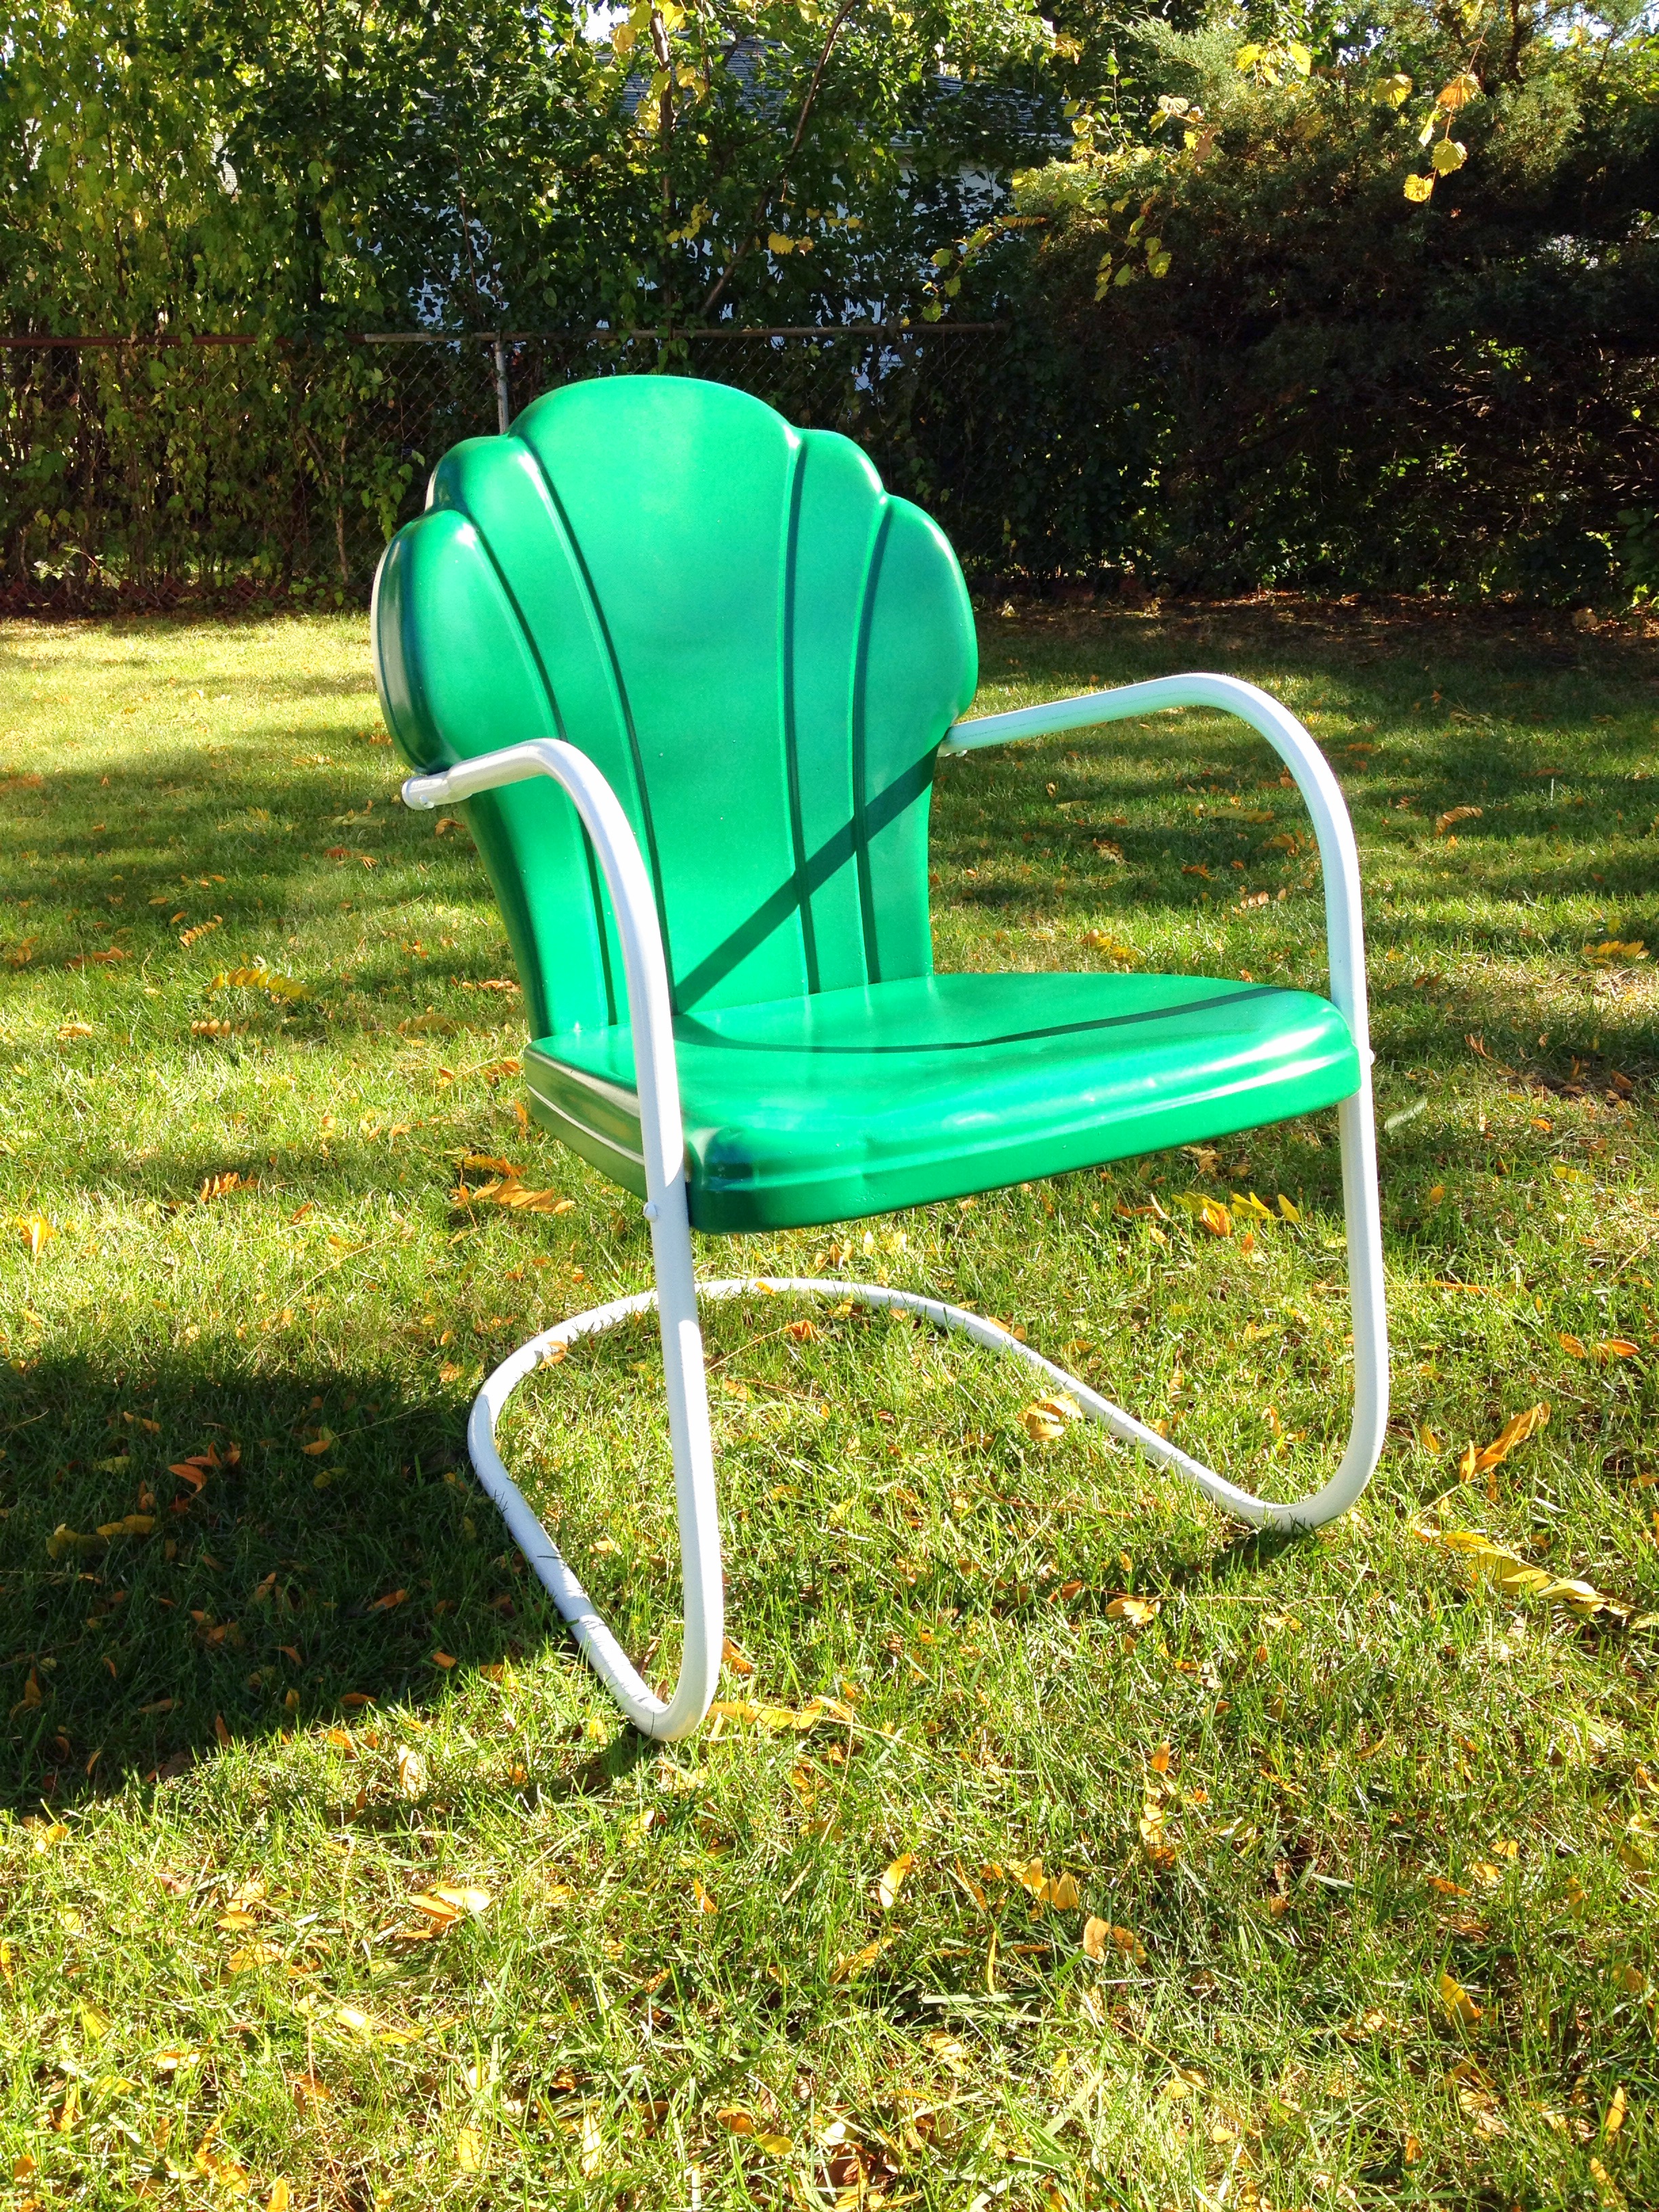
The Finished Product
I was thrilled with the finished product! The combined process took me just over 3 weeks because of the extra dry time on the paint but it was well worth the wait. This is perfect for the front porch of a cottage, rooftop in the city or the backyard in the burbs. They are durable, timeless and great addition to any outdoor entertaining space.
 Jack Pettyjohn is a native of Traverse City, MI. He moved to Chicago in 2006 and graduated from Loyola University Chicago with a Bachelors in Advertising and Public Relations. His passion for restoring historic “treasures” started at the age of 10 when his grandfather gave him his first Antique Electric Fan and since then he always searches for ways to restore the past. For questions and tips please feel free to reach out to him at [email protected]

0 Comments