
The Project
I am a fairly organized person, or at least I like to tell myself that. Which is why, when I started getting more and more into working on restoration projects, having my tools scattered about was starting to get on my nerves. But instead of just going out and buying a tool box I wanted to do something to go along with my restoration theme and at the same time giving you all some ideas as to what you can put in your own restoration tool box. Thus began, the Rusty Toolbox Restoration.
The Find
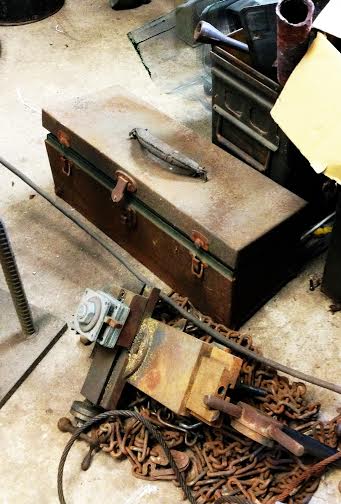
 If you have read this blog before you will know that my family often helps me find the treasures that I restore. This one was no different. On a visit home for the holidays my Dad and Uncle joked about me needing a toolbox and that if I looked in the scrap metal pile I would find the perfect one. Needless to say it looked like a piece of junk so I knew it would be perfect!

Before restoring I wanted to do a little research on this toolbox. I wanted to see how old it was and where it came from. What I discovered was that it was originally made by the Kennedy Manufacturing Co. out of Van Wert, Ohio as part of their BigHorn Line of toolboxes. I could not discover the exact year but this toolbox matched several images with “World War II era” posted on them. The Kennedy manufacturing company celebrated its 100 year anniversary in 2011 and this quote from their company website captures the history of these toolboxes and just how cool it can be to recycle / restore something that has lasted so many years instead of just buying new.
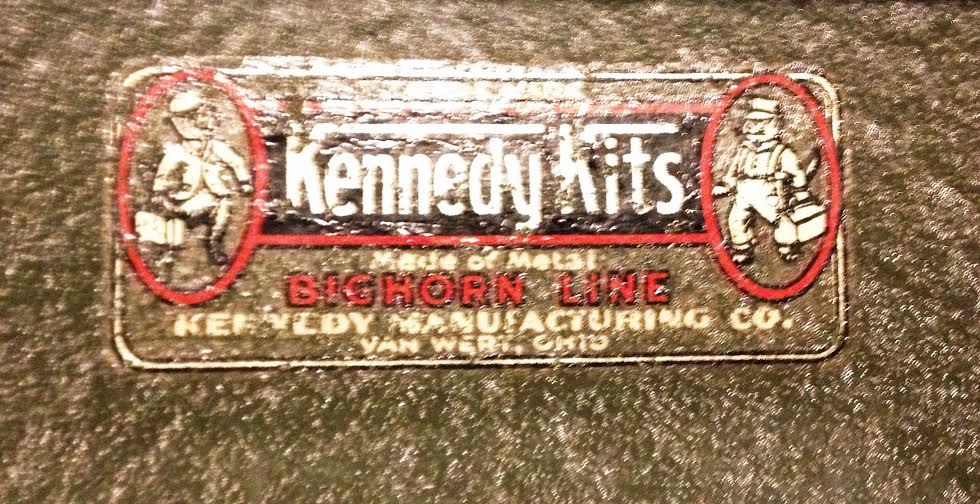
“During the past 100 years, our boxes have stood beside the American worker through one great depression, several recessions, prohibition, two world wars, a missile crisis, numerous military conflicts, lunar landings, the building of a wall, the fall of the wall, September 11th, the first African American president, and the first and last shuttle launch.”
http://www.kennedymfg.com/Kennedy/
The Process
 Step 1: Grinding off the Rust – The rust on this thing was thick but it was still salvageable because most of it was just surface rust that hadn’t pitted all the way through. To remove the rust I used an electric angle grinder with a wire brush attachment. This gave me the power to really bust through the rust while not doing damage to hardware or structure of the box. The nice thing about the wire brush attachment it shat it gets into all of the groves of the metal. I would also like to add that you need to make sure you wear safety glasses while working with a tool like this to ensure that you do not get anything in your eyes.

Step 2: Taping off the Hardware – I decided I wanted the metal hardware to stand out from the rest of the metal toolbox. To do this I used blue painters tape and taped off the raised lock portion and clamps. For the 4 corner pieces that did not have a raised portion to tape to, I place the tape on flat and then when back with a razorblade to cut out the design of the metal.
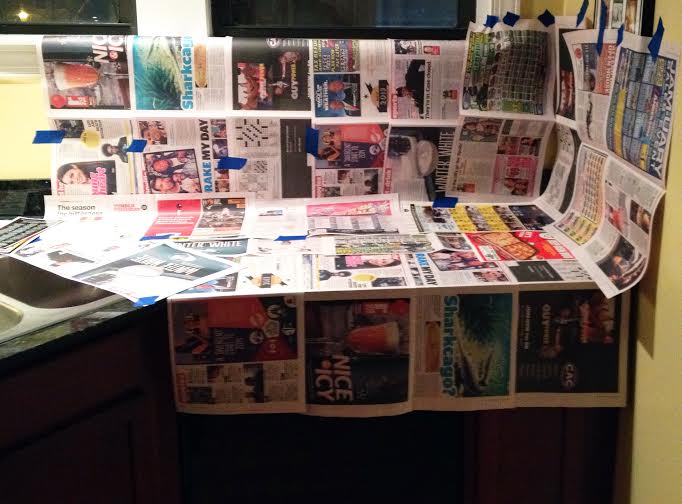
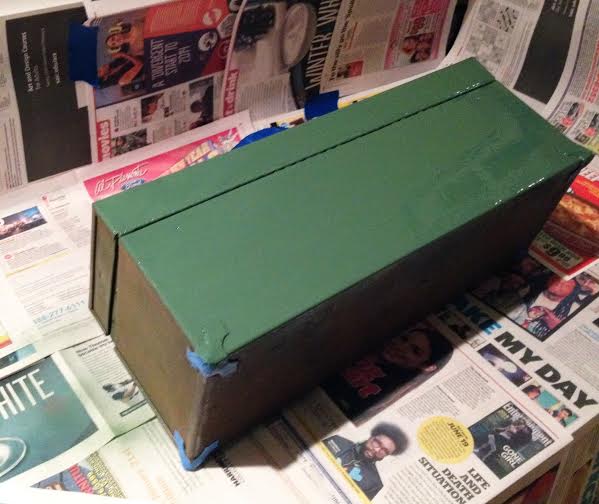
Step 3: Creating a painting environment – For those of you living in Chicago right now you will know that we have had extremely cold and snowy weather this winter. To complete this project I needed to create a place in my apartment that would be well ventilated so I could spray paint inside. The solution? My Kitchen. Windows and a vent allowed me to properly vent the space while spray painting. I took a stack of old newspapers and taped off a painting booth so that no over spray would hit my counters, walls and floors… you get the idea. There is no excuse to put a project off until the weather is nice!
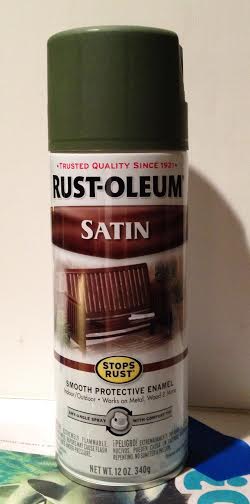
Step 4: Choosing the spray paint – I wanted to stay true to the original color of my tool box which was an army green. Also, for this project I wanted a satin paint so it would not be super shiny. It was important that the paint was rust resistant since I was covering up some rust and using it as a working toolbox – I was sure it would be exposed to the elements. I chose Rust-Oleum Satin in an Olive/Army Green that was very close to the original color. That was my preference but you could just as easily paint it Red, Blue or even Pink if you wanted to.
IMAGE 10
Step 5: Spray Painting – After I chose my paint the next step was just slowly and lightly spray painting. This took me two days because I continually rotated the toolbox and made sure it was not sticking to the newspaper. I wanted to make sure the paint cured fully so that there wouldn’t be any scratches in the surface allowing areas to rust. After letting it sit and cure for another day after I was finished painting I removed the blue tape and had a perfectly painted and useable toolbox!
The Finished Product
I was very happy with how my toolbox turned out. From something that was headed to the scrap pile to a useful toolbox again took just over a week to complete. Now I have a recycled, reused and restored toolbox to fit all of my tools in. I love the size, it’s perfect for city living, fits in my closet and is easy to carry over to a friend’s house if they even need help on a project. All in all, a successful Rusty Toolbox Restoration.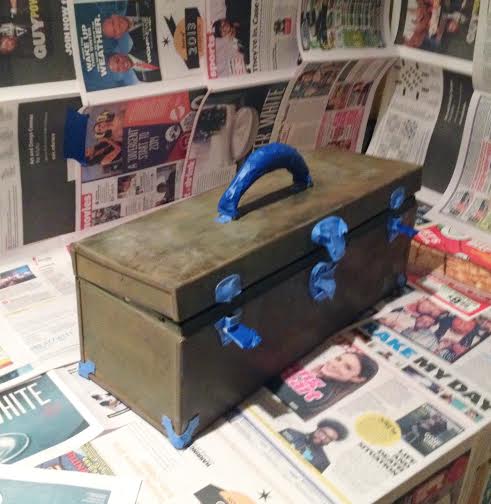

 Jack Pettyjohn is a native of Traverse City, MI. He moved to Chicago in 2006 and graduated from Loyola University Chicago with a Bachelors in Advertising and Public Relations. His passion for restoring historic “treasures” started at the age of 10 when his grandfather gave him his first Antique Electric Fan and since then he always searches for ways to restore the past. For questions and tips please feel free to reach out to him at [email protected]


Hi there! This post couldn’t be written any better! Going
through this article reminds me of my previous roommate!
He constantly kept talking about this. I will send
this information to him. Fairly certain he
will have a very good read. Thank you for sharing!
Good day! I could have sworn I’ve been to this
web site before but after going through some of the posts
I realized it’s new to me. Anyhow, I’m definitely pleased I came across it and
I’ll be bookmarking it and checking back frequently!